SETTINGS FOR YOUR SIMPLE RSI TRADER
On this Page are settings you can consider for your Simple RSI Trader gen 1 and Gen 2. Something you need to know is that there are no perfect settings that will work perfectly for all Currencies, Timeframes, market conditions for months and months on end. Therefore you need to know how to change settings that provide poor results. Below are some suggestions:
1. CURRENCY SELECTION: The RSI likes sideways markets and currencies. Using the 4 hours chart look for currencies that are not in big trends and look like they are trading sideways in a wavy way. Use currencies with low volatility to start with. It your currency is not providing good results CHANGE IT
2.TIMEFRAMES: Some timeframe and currency combinations are more favorable than others. It the timeframe you are using is not working CHANGE IT. Start with the 1 hour timeframe. That will give you an opportunity to change to the 4 Hour or 15 minute time frames. The 4 hour time frame is more reliable but produces fewer trades.
3. THE RSI TIME PERIOD SETTING. The shorter the time period the more signals you will encounter. The more signals you encounter the more likelihood of false signals. If you are experiencing poor results CHANGE THE RSI PERIOD to a setting that is bigger than the one you are using.
4.THE RSI BOTTOM LEVEL FOR BUY ENTRY SETTING. The smaller that setting the fewer trades but more reliable the trades. If you are experiencing poor results CHANGE THE SETTING by decreasing the setting s from the level you are currently using.
5. THE LOT SIZING SETTING. If you are experiencing poor results CHANGE THE SETTING by halving or even using a quarter of the size of the settings you are currently using for the Fixed Lots or %of equity settings. This will reduce losses but will also income. It will give you more time to resolve the other settings.
6. STOPS AND TARGETS. If you are experiencing poor results CHANGE THE TARGET AND STOPS SETTINGS. In general you should increase the size of your stops and decrease the size of your targets to improve results. Stops and Targets should take the volatility of currencies as well as timeframes into account - small stops and targets for low volatility and fast timeframes.

It is essential that when testing or trading the Simple RSI Trader, use between 5 to 10 of the strategies in a portfolio that does not favour any currency excessively. It is recommended to test 10 strategies for a few weeks and then only select the best results to trade live.
There are general guides for your to follow. Your overall results are dependent on the balance of all of the above factors to create a risk balanced, good trading strategy relevant to current market conditions. Often this is only discovered by trial and error, a process of continuous improvement during back testing and forward trading.

See 25 strategies currently being forward traded to determine the best currencies, timeframes and settings for the Simple RSI Trader when traded on Real funded Broker Accounts.
CLICK HERE:- Our Simple RSI live trading Test Lab
Settings for the Simple RSI Trader Gen 1 and Gen 2
The objective of the Simple RSI Series is to keep Robot trading as simple as possible.
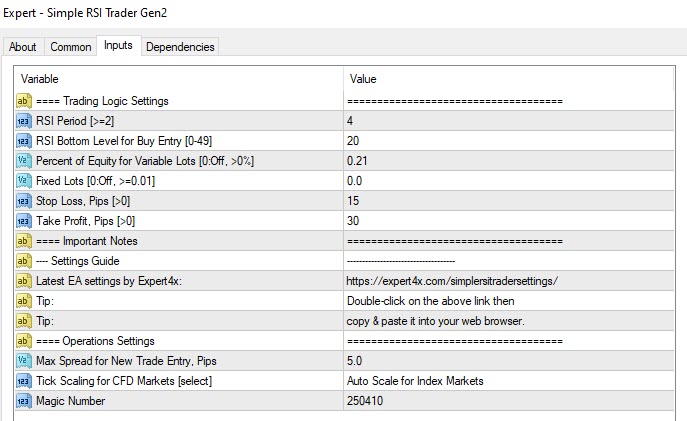
The settings can be seen on the right and there are effectively only 6 possible settings for the Gen 2 version of the Simple RSI Trader.
The settings are discussed below
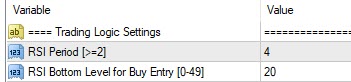
THE RSI and BUY Level Setting
The good news about the Simple RSI is that is uses Universal settings. This means that the same settings will probably work (80% chance) for any Currency or Instrument and any Time frame.
This is because the RSI indicator formula takes the volatility of the instrument being traded and the timeframe being used into account. So, the RSI reading will automatically adjust to the Instrument and Timeframe traded.
After considerable research in this area, we have identified the following guidelines for the RSI period setting and the BUY Level setting. Generally, 80% of successful results share the following characteristics:-
-
The RSI period setting is between 2 and 7
-
The Buy level setting is between 5 and 35
The primary test for whether your settings are balanced is that when dividing the buy setting by the RSI setting, the answer (RSI FACTOR) should not be more than 6, with the ideal range to be between 3 and 4.5.
EXAMPLE:
RSI period setting = 6
Buy Level setting = 20
Buy level divided by RSI period is (20 divided by 6) = THE RSI FACTOR 3.3, which falls in the range of 3 to 4.5.
A general guide is that a RSI factor of 4.5 will produce more trades with potentially lower success rates, and a RSI Factor of 3 will produce fewer trades with higher success rates. So if you are not getting the results you expect, reduce the combination of the RSI period setting and Buy Level settings to give a lower RSI Factor.
These RSI period and Buy Level settings can be applied to all instruments and timeframes when trading the Overbought and Oversold return entry strategy.

The Target and Stop loss settings
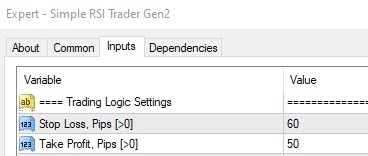
Targets and stops should take volatility and timeframe into account.
Typical guide settings for high volatility and different timeframes are shown below.
As before there is a Target/Stop Ratio that provides a guide to the balance between the target and stop ratio.
If you divide the stop by the target the answer should ideally be between 0.7 and 1.3
EXAMPLE
Target = 70 pips
Stop = 90 Pips
Target/Stop ratio is (70/90) 0.77 which falls in the range of 0.7 and 1.3
Typical guide settings for high volatility and different timeframes are shown below.

Fixed Lot Sizing
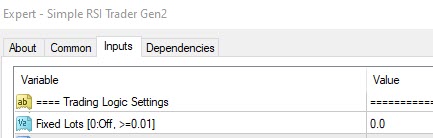
Ideally, the amount risked (Stop size x pip value x your lot size) should not be more than 3% of your Account size. 1% is low risk, 2% is medium risk, and 3% is high risk.
EXAMPLE
* Stop (pips) x pip value x lots size = amount risked
* 50 pips x $10.00 x 0.05 lot size (initial estimate) = $25 (amount risked).
* Account size is $1000, so your risk is 25/1000 = 2.5%
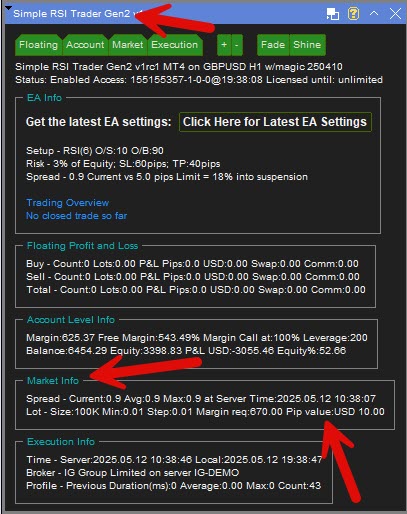
You get the pip value from the robot's information table. See below.
So finding your correct lot sizing is a complicated calculation for most traders. That is why many Traders prefer the % of Equity method.
How to find the pip value of the currency you are trading
% of Equity Lot Sizing
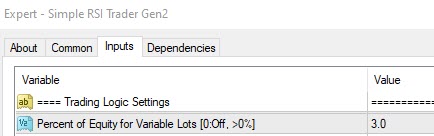
This is sometimes easier. You simply tell the Robot the % you want to risk and it will calculate the lot size. In the example above, if you enter 2.5% in the % of equity setting, it will automatically calculate the lot size of 0.05 for you for your next trade (per the previous example for the fixed lot setting)
The advantage of % of equity is that in a losing streak, your lot sizing becomes smaller, and in a winning streak lot sizing increases.
The other advantage of the % of Equity method is that it can be used to create above average returns as shown by the video on the right
Other settings
Max Spread for new trade entries (Pip)
The setting is to prevent traded from being opened when there are big spikes in spreads. Enter +/- 3 to 5 time the normal spreads (min 5 pips)
Tick Scaling for CFD Markets
Use the setting if your want to trade Non-Forex instruments
Magic Numbers
To be safe, use different magic numbers (any number will do) for each strategy traded. It helps the Robot track strategies and currencies traded.